Objective of this guide:
In this guide we see how to configure a RW (Road Warrior) VPN server via OpenVPN on pfSense®. The aim is to create a basic configuration to allow a correct functioning of our VPN.
Used Hardware:
This guide can be applied to all the hardware certified by us of the firewall line that you can find here: https://www.miniserver.it/firewall
Software environment:
pfSense® 2.4.x
Let’s configure OpenVPN:
First of all, from our top menu, go to VPN/OpenVPN/Servers.
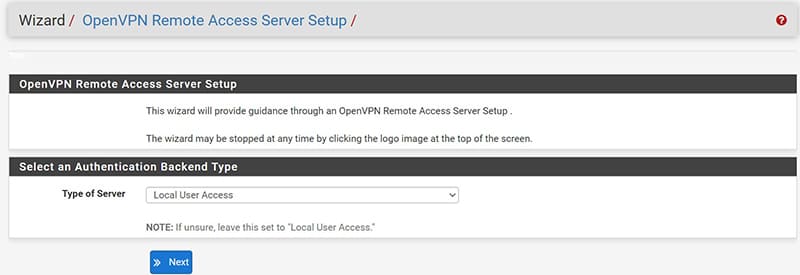
We also proceed from the convenient Wizard that will allow us to easily create our CA (Certification Authority), the Server Certificate and the configuration of the RW VPN Server; these components can also be created individually.
Let’s start by selecting Local User Access
At this point it is time to create our CA, as a necessary parameter we must enter a “Descriptive name” that will allow us to identify it, while all the other parameters can be left by default.

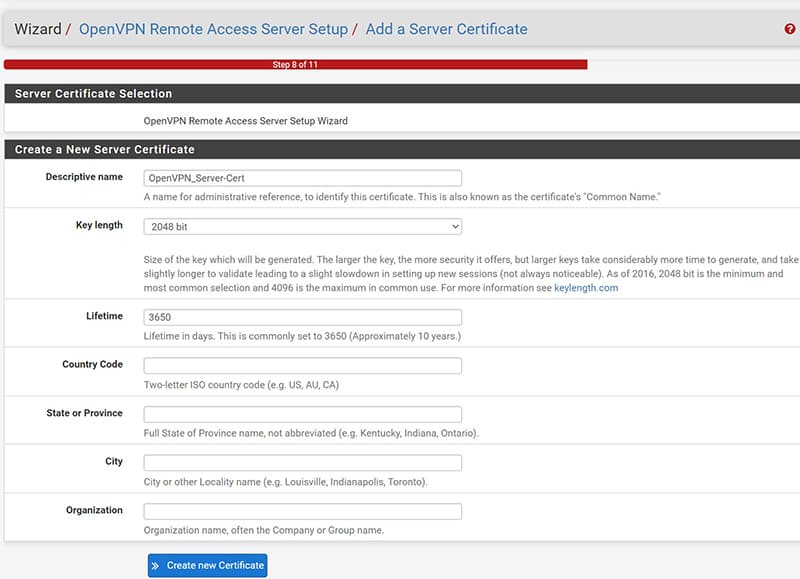
Let’s move on to creating the Server Certificate to be associated with our VPN server, as perl the CA will require a “Descriptive name” and leave the other default parameters.
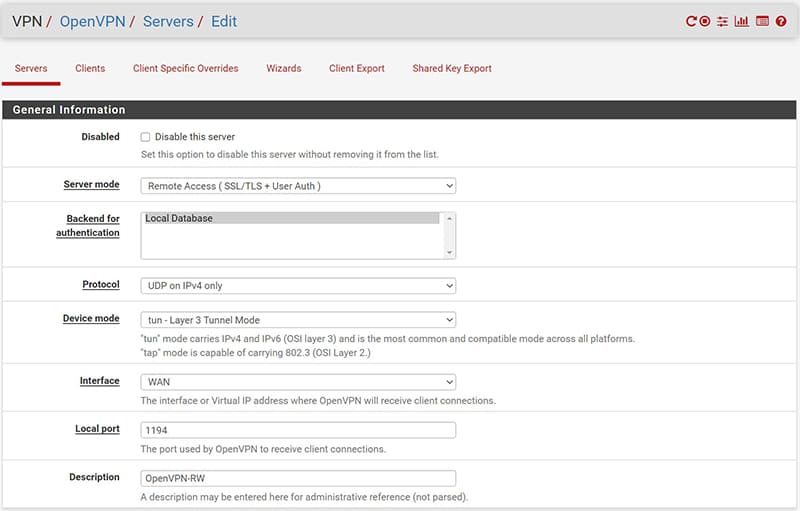
Now the actual VPN server configuration.
In the “Interface” item we select the interface on which we want our service to listen, if we have more than one WAN interface we choose the one we want to dedicate to the service, if we want later we can select multiple interfaces for greater redundancy.
It is appropriate to consider that the port that we will choose for the VPN must be open on the listening interface, therefore if we are behind a Router of some ISP it will be necessary to be able to open the door to the interface of our Firewall, if instead we have the possibility of having a Public IP address directly configured on the Firewall interface will be sufficient to create an associated rule (as we will see later).
We choose the protocol to be used and the port dedicated to the service (default for OpenVPN is UDP 1194).
In the “Description” item we choose the name with which we want to identify the server.
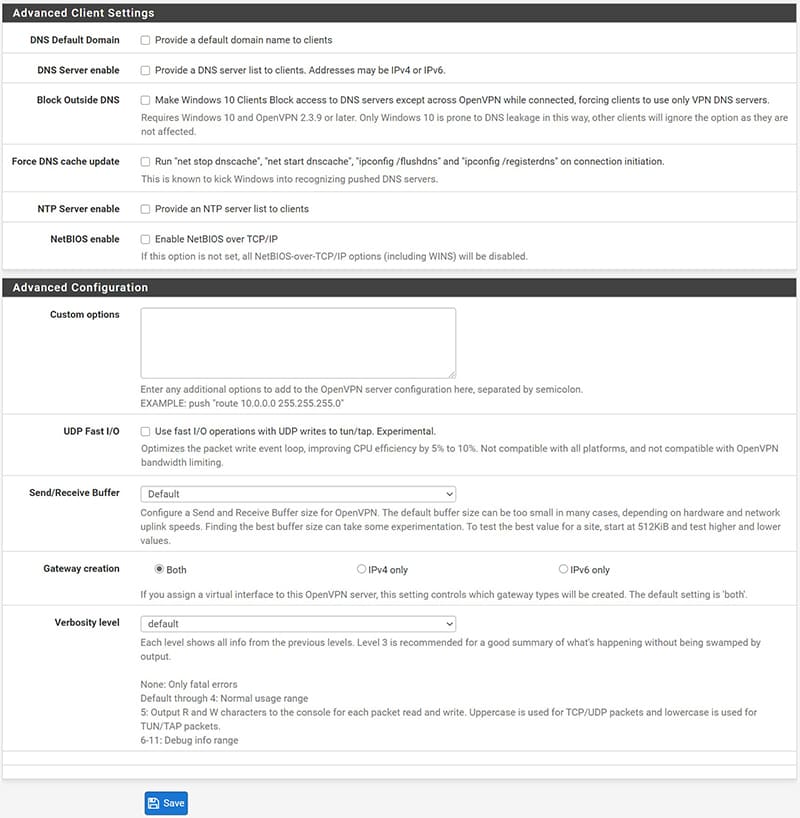
In the “Cryptographic Settings” section we can leave everything by default.
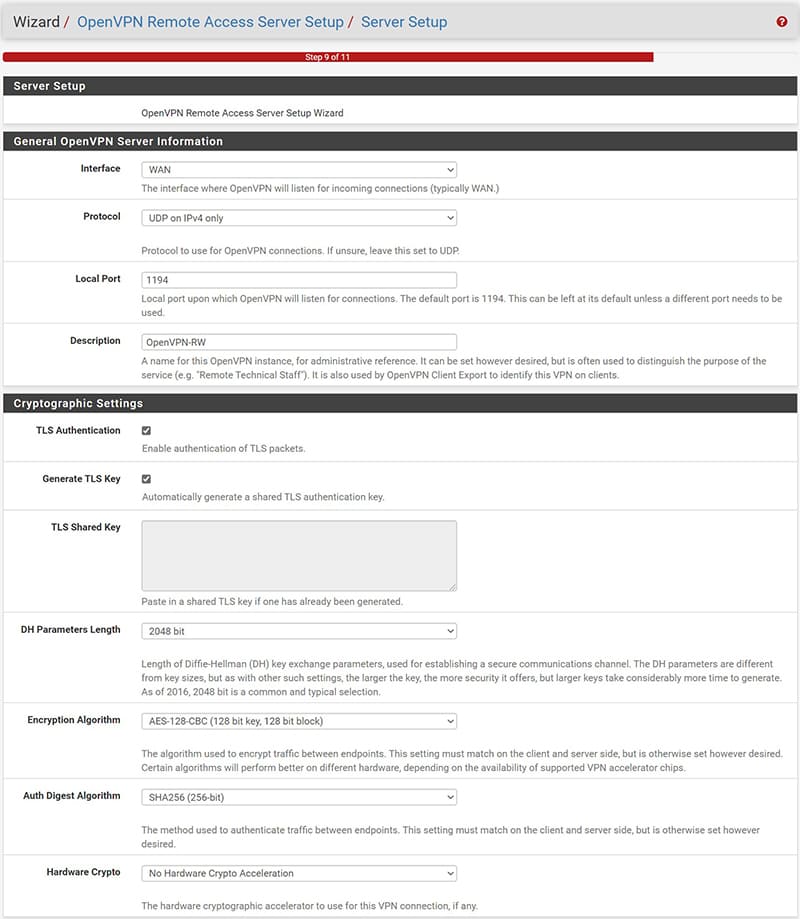
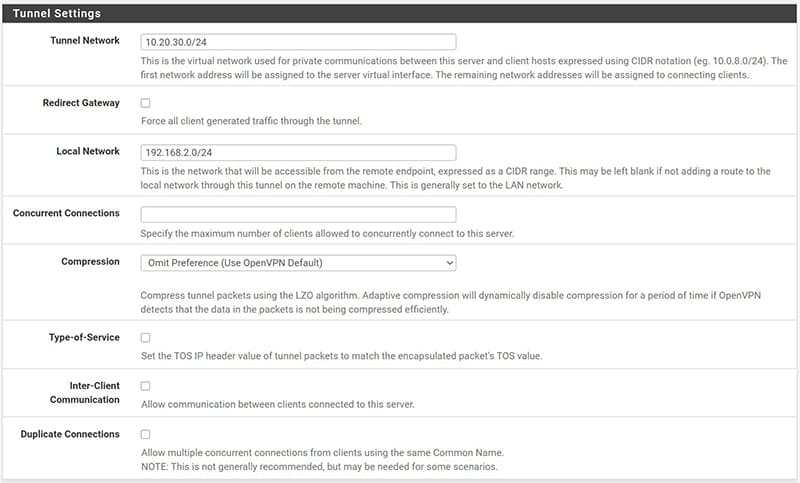
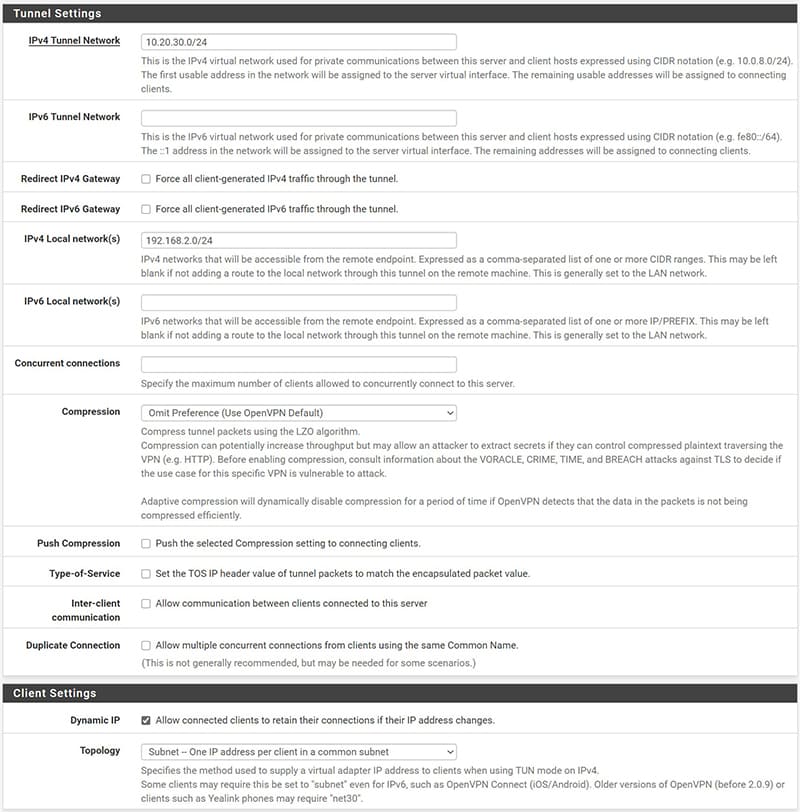
In the “Tunnel Settings” section it will be necessary to indicate a “Tunnel Network” that we could choose at random, making sure that it is not the same as other known networks or public networks, in fact it is the virtual network that will use the VPN.
In “Local Network” instead we will indicate the LAN network to which you want to give remote access, if there are multiple LAN networks to which we want to give access, you can enter them by separating them with a comma.
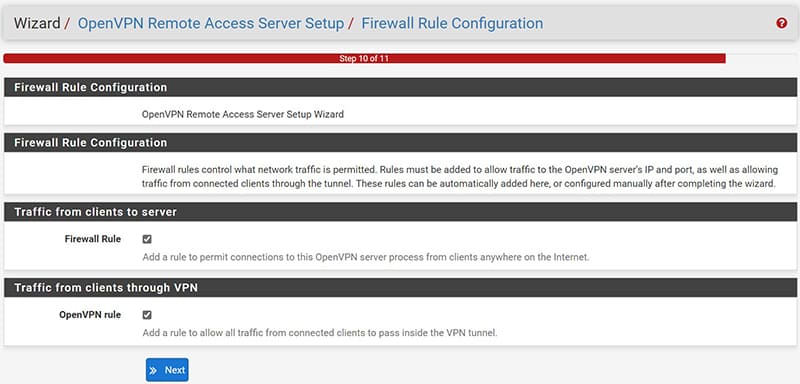
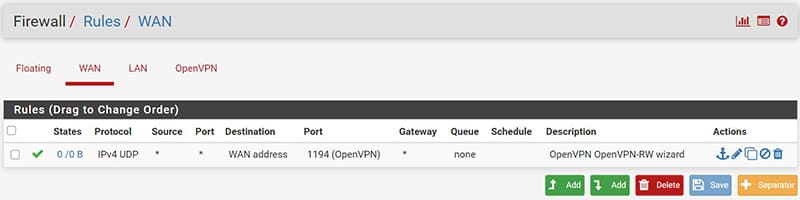
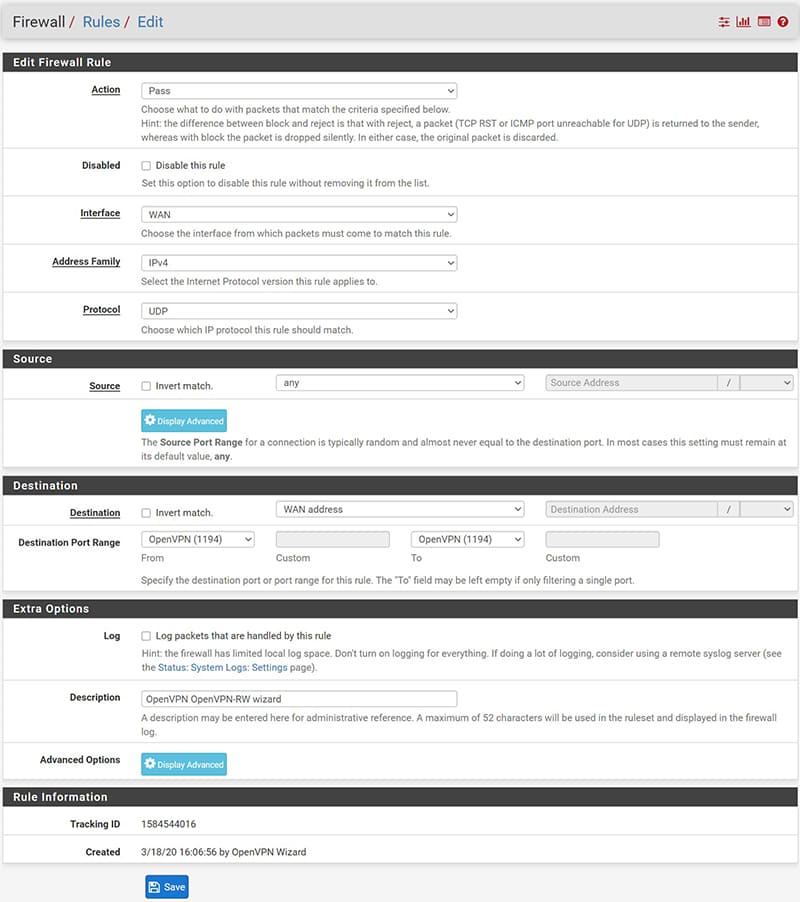
At this point the wizard asks us if we want to insert the Firewall Rule associated with the WAN interface and the one with the OpenVPN virtual interface, by ticking both will automatically create.
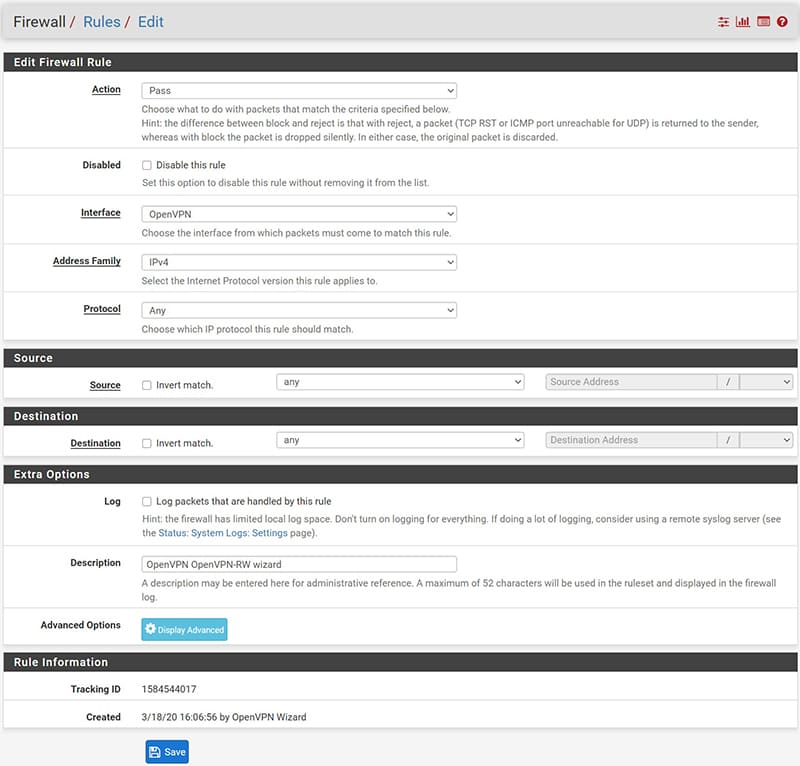
Let’s now see in detail the completed server configuration, as anticipated it is a basic configuration but we can always restrict security, for example by setting the maximum number of client accesses in “Concurrent connections”, or increase the level of encryption. These adjustments can affect the performance of the equipment and the connection.

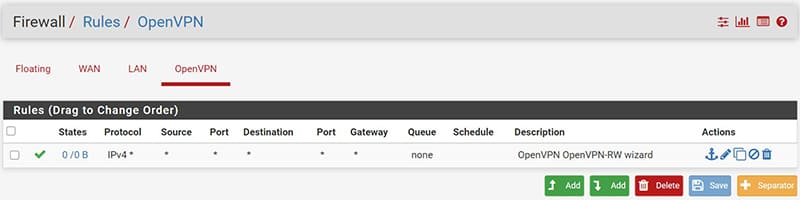
Below is the detail of the Firewall Rules created:
- For the WAN interface
- For the OpenVPN interface
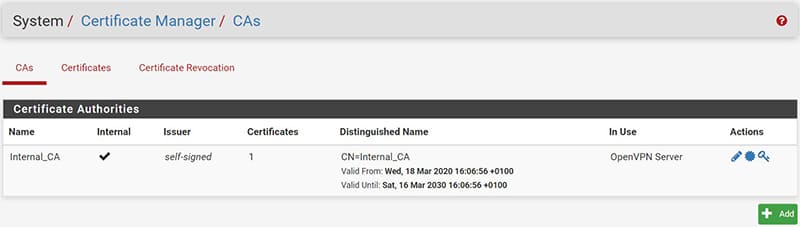
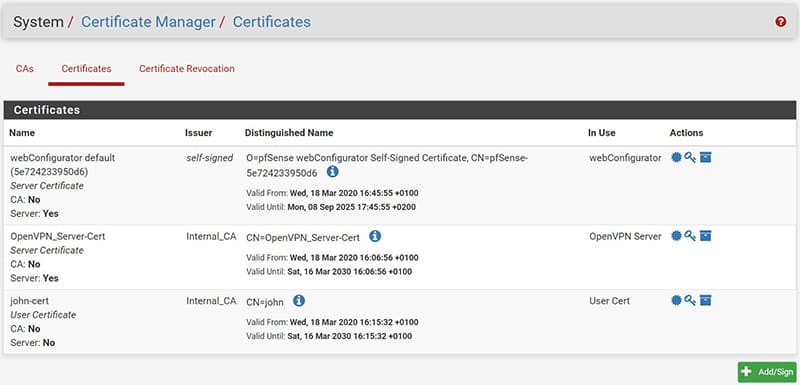
The CA.
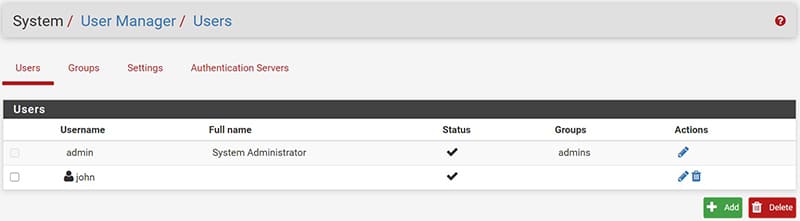
Now let’s see how to create the users we want to connect to in VPN.
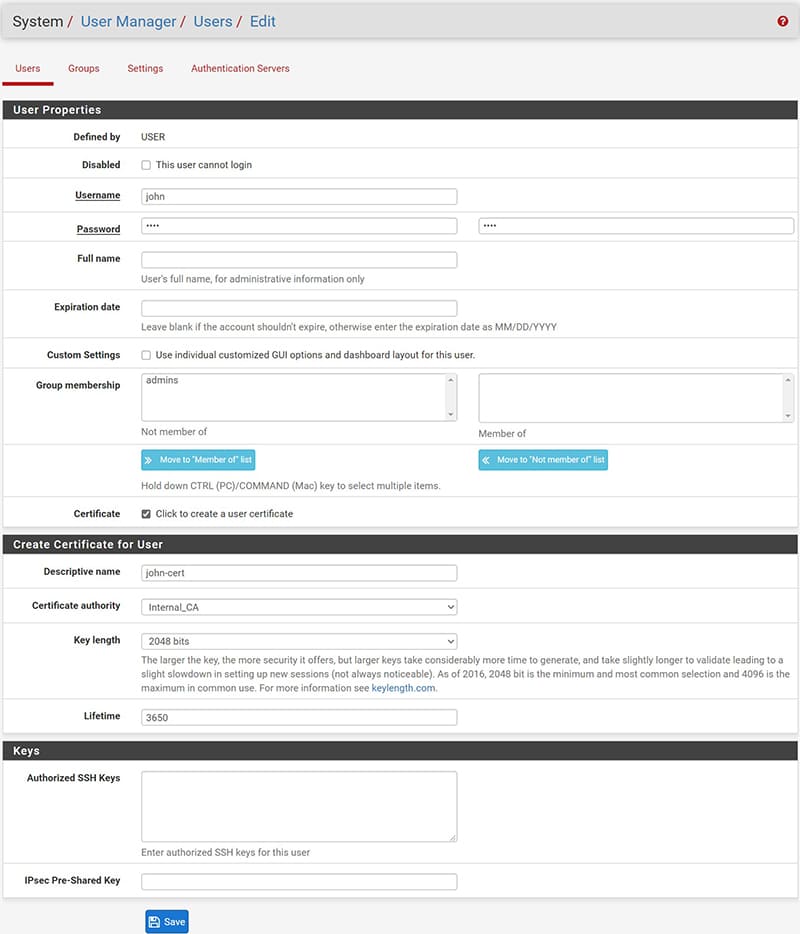
Position ourselves under System / User Manager / Users and create the username and password and User Certificate associated with the user by checking the “Certificate” “Click to create a user certificate”, you must enter a “descriptive name” to the created certificate. In this way we will have created both the user and the associated certificate in a single operation
In the “Certificate Manager” section we will see the certificate associated with the VPN server and all those associated with the users created.
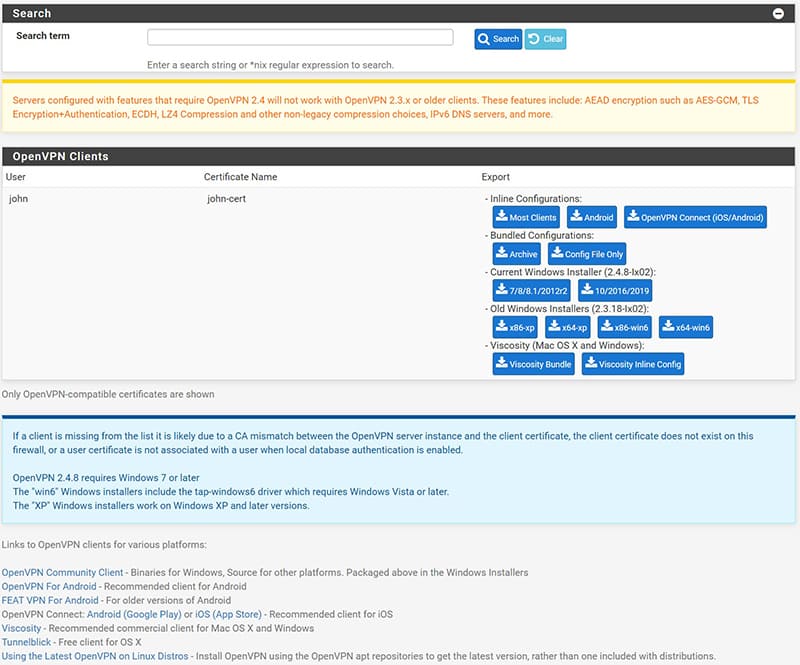
At this point we can export the configuration files and certificates for individual users who will use the VPN clients to connect.
First of all it is necessary to install the package “openvpn-client-export”, to do this we can search for it by going to System/Package Manager/Available Packages.

Once installed we will see the option added under OpenVPN / Client Export.
Under “Remote Access Server” we select our created VPN server.
In the Client Connection Behavior section we will enter the parameters with which the .ovpn configuration file will be generated for the user, in particular we recommend configuring as follows:
- “Host Name Resolution” on “Other”
- “Host Name” we will have to enter the Public IP address of our network
- “Verify Server CN” we can leave it by default on “Automatic” or if we have problems set it on “Do not verifythe CN server”.
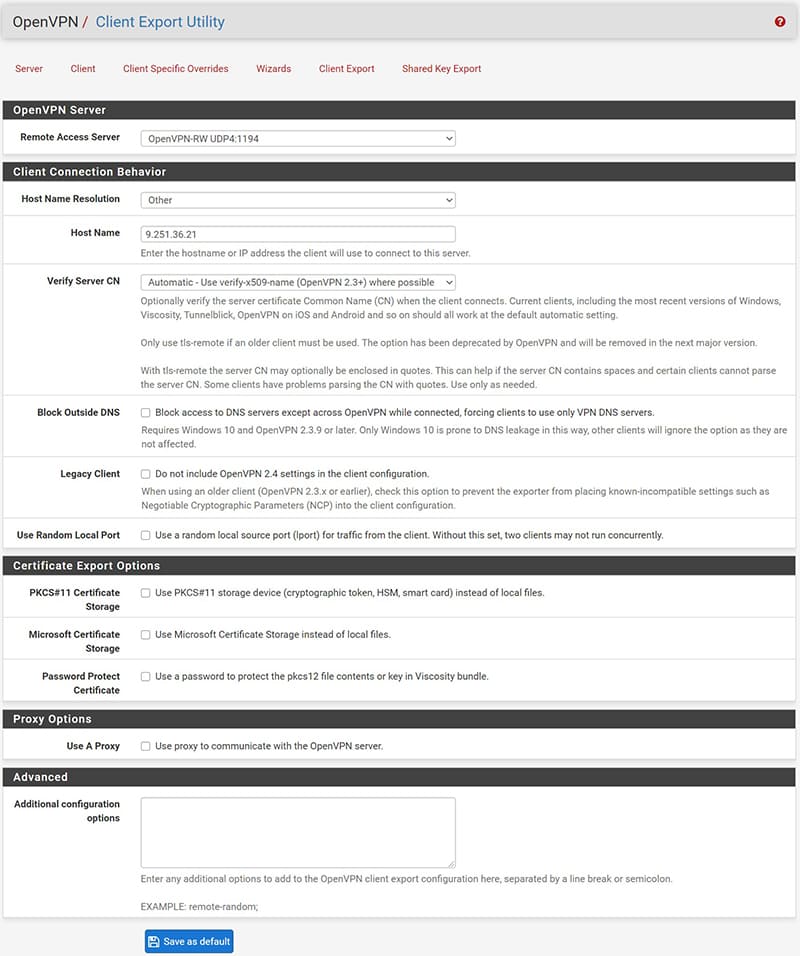
Once the parameters are configured, we can export our users configuration file to be installed on the clients.
To do this we have various choices, the most recommended below:
- “Most Clients”: genera un file .ovpn contenete sia la configurazione che i certificati e le chiavi facilmente importabile, compatibile con i client: OpenVPN per Windows, Tunnelblick per OS X
- “OpenVPN Connect”: generates an .ovpn file compatible with OpenVPN Connect Apps for Android and iOS
- “Archive”: compatible with Windows, generates an archive containing, in 3 separate files, the configuration (.ovpn), certificates (.p12) and the key (.key)
- Under the “Current Windows Installer” section we can generate self-installing and preconfigured files for Windows clients