In this guide we will see how to limit, and thus make more limited the access of users who connect from the outside in VPN via our pfSense to the LAN.
By means of a time schedule, it will be possible to limit the accesses of the clients that connect with OpenVPN and create restrictions on the accesses of the individual servers and devices.
Used Hardware:
This guide can be applied to all the hardware certified by us of the firewall line.
Software environment:
Access Schedule for OpenVPN users:
To allow access of our users only in a time interval it is necessary to create a schedule that will be useful to us on several occasions.
-
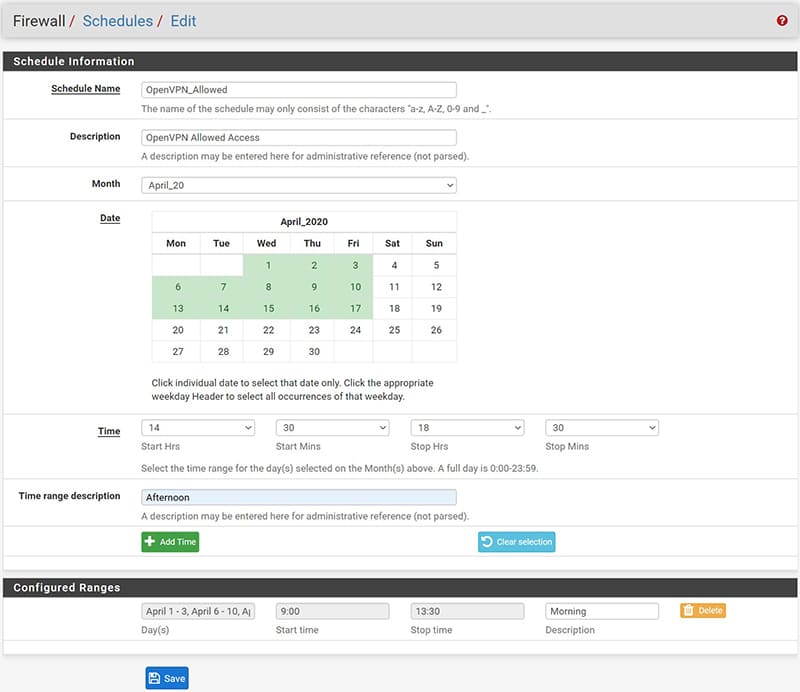
- We proceed by going to Firewall / Schedules / and press the Add button.
- In “Schedule Name” it is necessary to give a name to our schedule.
- At this point we will select the month to apply it and the days by clicking on the single day of the calendar,
- select the time range and click on “Add Time”.
- Repeat the procedure to add another time / date range to be assigned to this schedule.
- All created ranges will be displayed under “Configured Ranges.
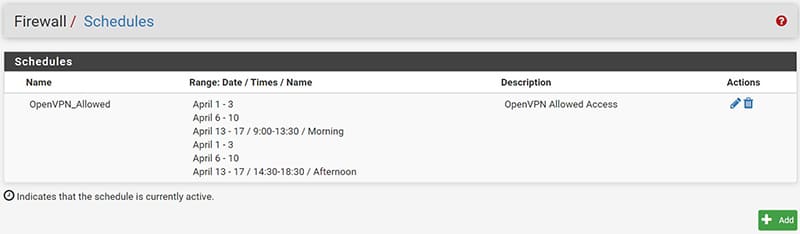
Here’s what our completed schedule will look like.
At this point, in order to implement the scheduling created in the Firewall Rules, it is necessary to assign a very specific static IP address of the VPN tunnel to the user / s we want to limit.
This is necessary because the firewall manages the rules via IP addresses.
To assign a static IP address to the user, we will proceed as follows:
- go to VPN/OpenVPN/Client Specific Overrides and press the “Add” button
In the configuration screen that will appear, it will be sufficient to configure only 2 items:
- “Common Name”: the name of the VPN user
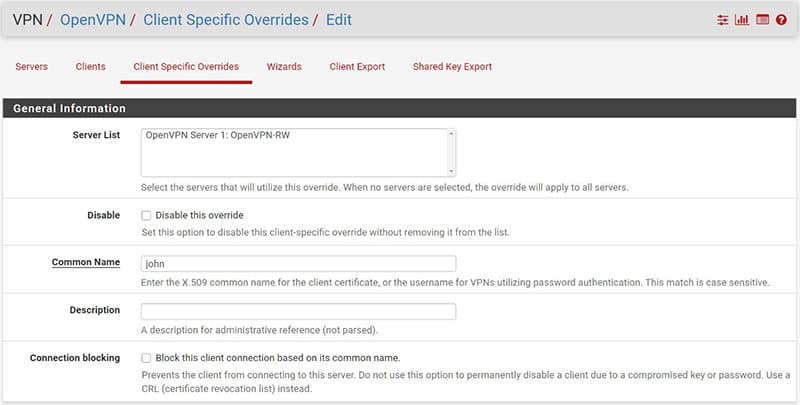
- “Advanced”: we will have to insert the following string ifconfig-push [IP_TUNNEL] [NETMASK]
Where IP_TUNNEL will be the IP address of the tunnel that we would like to be assigned to the user.

We repeat the procedure for each user we are interested in managing.
Access management and restriction for OpenVPN users
We can now implement our schedule created previously in the Firewall Rules to regulate user access and limit or allow access to individual servers.
It will be explained how to allow access to a server at a certain time, only to a specific user who connects via VPN
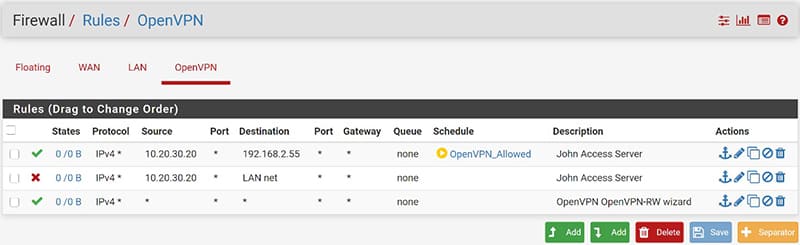
Let’s start by going under Firewall / Rules and positioning ourselves under the “OpenVPN” interface, press the “Add” button to create a new rule to be placed at the top.
Select “Any” as protocol and in “Source” enter the IP address belonging to the VPN Tunnel network defined previously and assigned to the user concerned.
In “destination” we can enter in “Single host or alias” the IP address of the server to which we want to restrict the user’s connection.
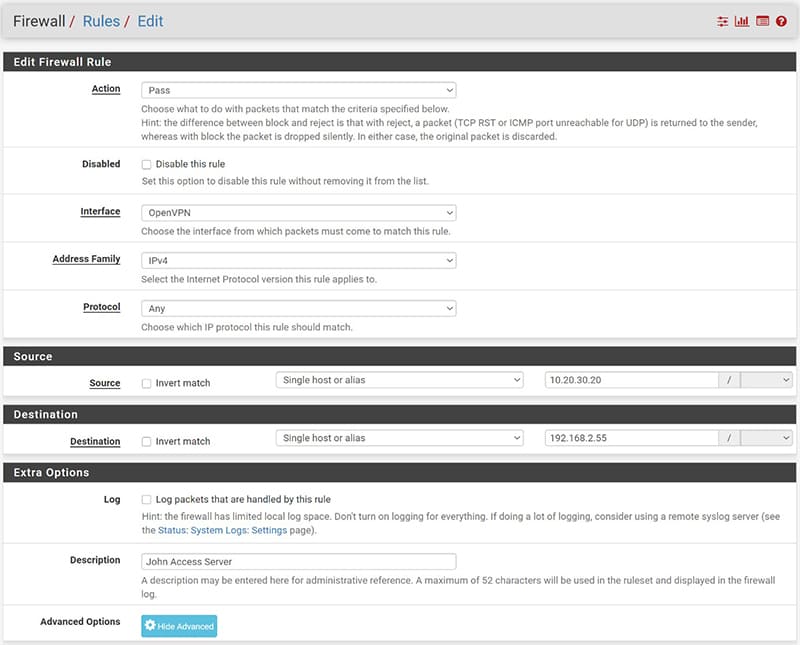
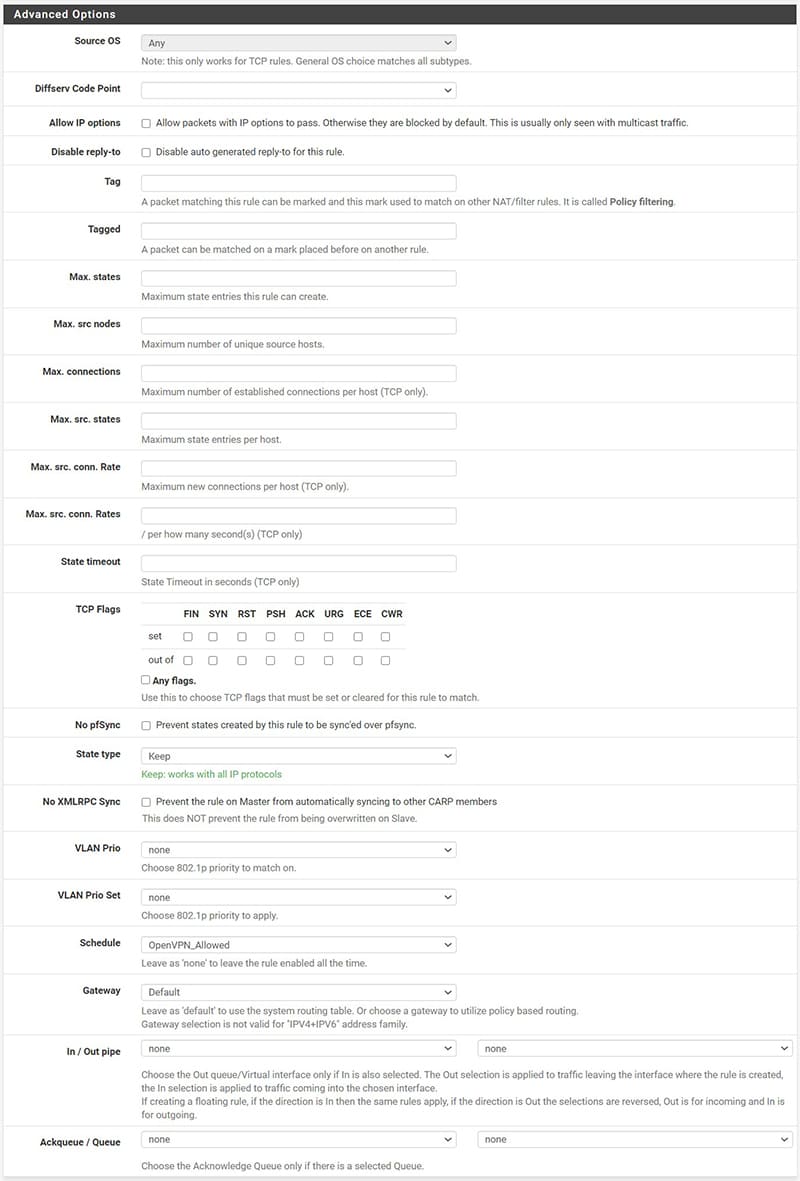
Finally, let’s position ourselves on “Advanced Options” and in the “Schedule” item select the Schedule created previously.
In this way we have allowed the user “john” who connects in VPN with the IP address of the Tunnel 10.20.30.20 to access only the server 192.168.2.55 during the time range established in the scheduling.
We can repeat the procedure for each user to whom we want to grant access to the server at a certain time range.
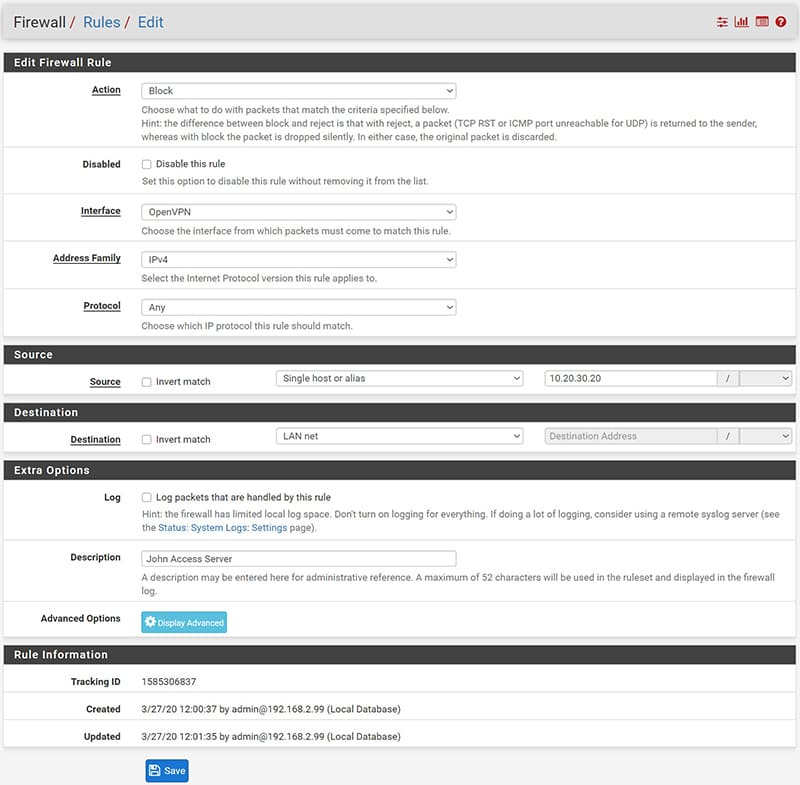
At this point, to prevent the user from accessing other devices on the network, we create a rule that blocks access to everything. This rule must be placed UNDER the previously created access rules and associated with it.
Here is how the created rules will appear, to note that the symbol in correspondence with the “schedules” is green if at that moment we meet the rules described in our schedule.
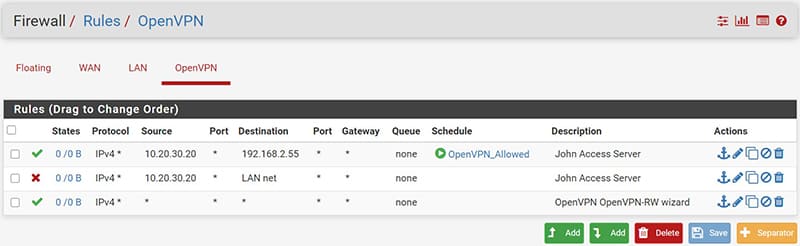
It will be yellow instead when we are out of the scheduling range and therefore you will not have access.