From OPNSense version 25.7 onward, to create a VPN server with OpenVPN it will be mandatory to use the Instances tab.
You will still be able to import old VPN configurations from a backup up to the latest version of 25, while starting with version 26 this will no longer be possible.
At the time of writing this document, there is no wizard for creating a VPN with OpenVPN/Instances (VPN → OpenVPN → Instances); therefore, everything must be created manually.
How to Create a Road Warrior VPN on OPNsense with OpenVPN Instances
1. Certificate creation
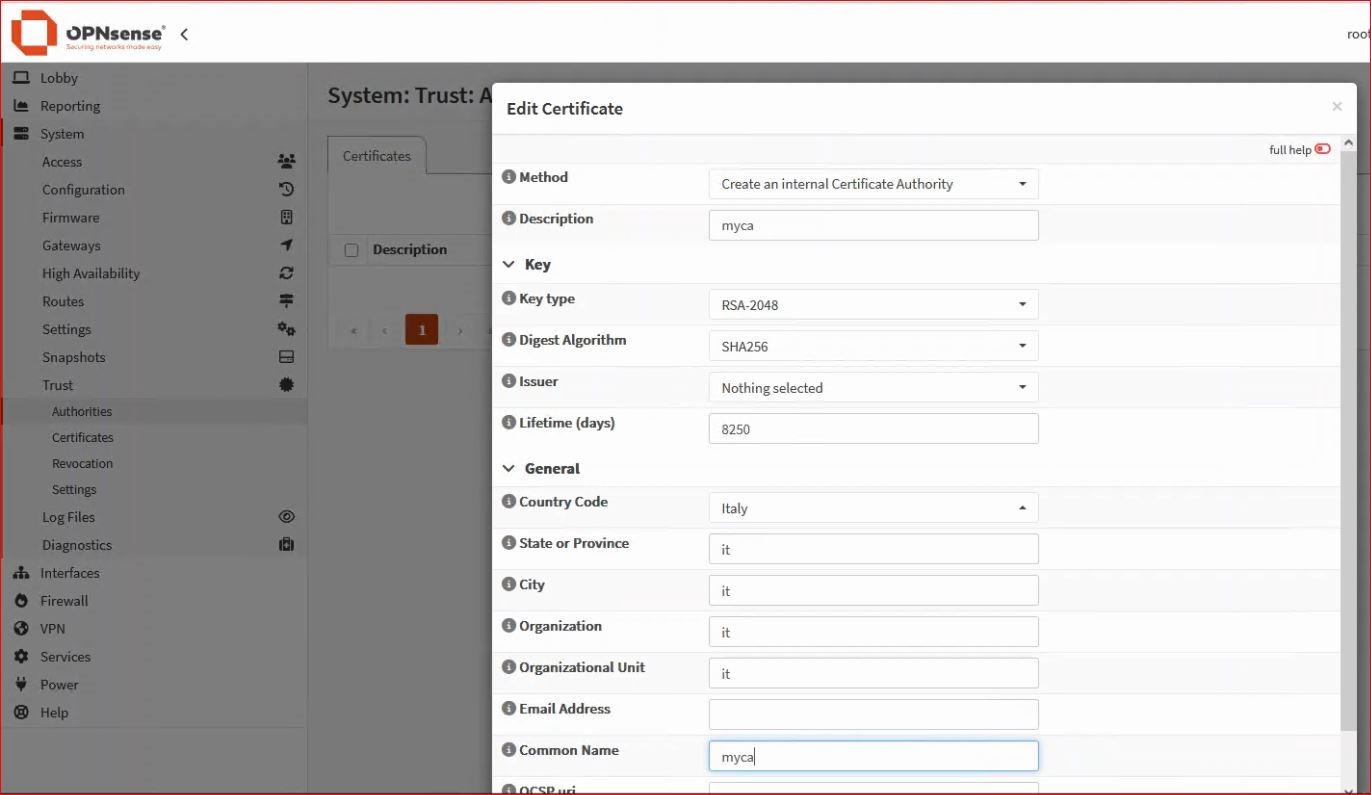
Authorities
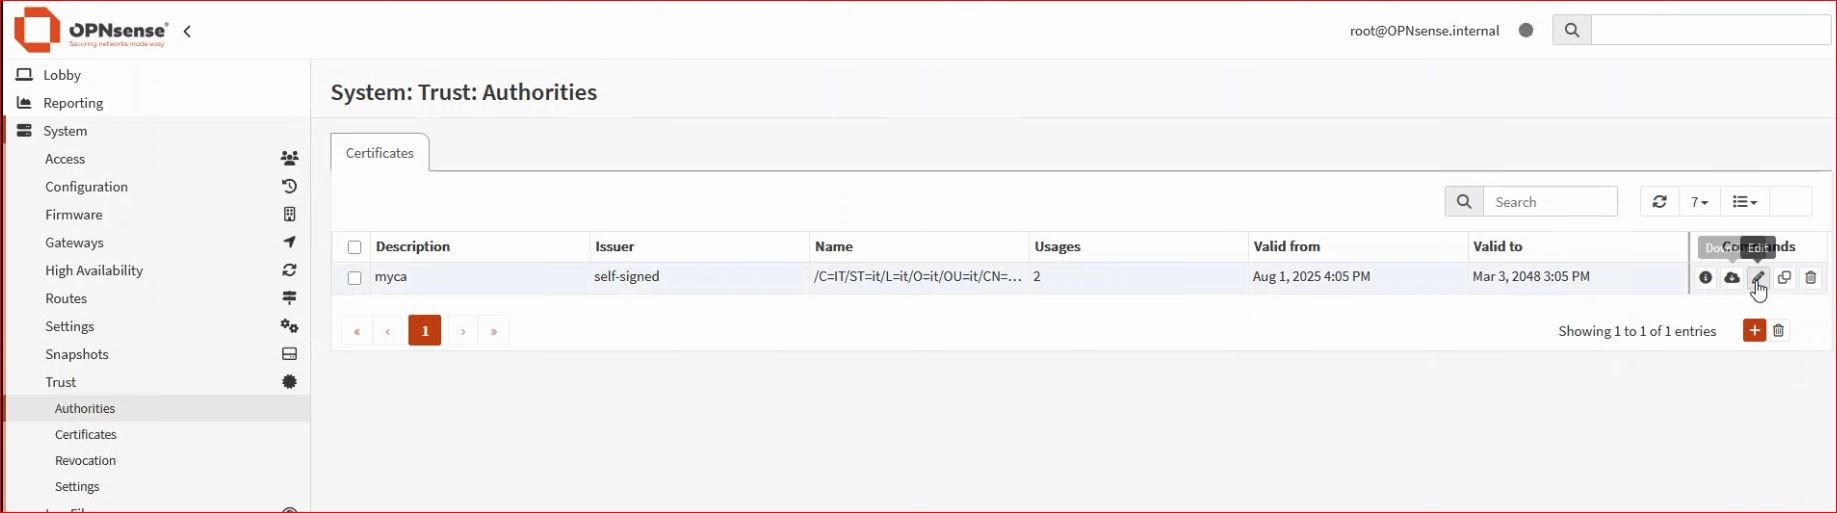
From the menu, select System → Trust → Authorities and configure an internal CA.
Fill in your internal certificate authority, making sure to choose an appropriate lifetime and a meaningful common name.
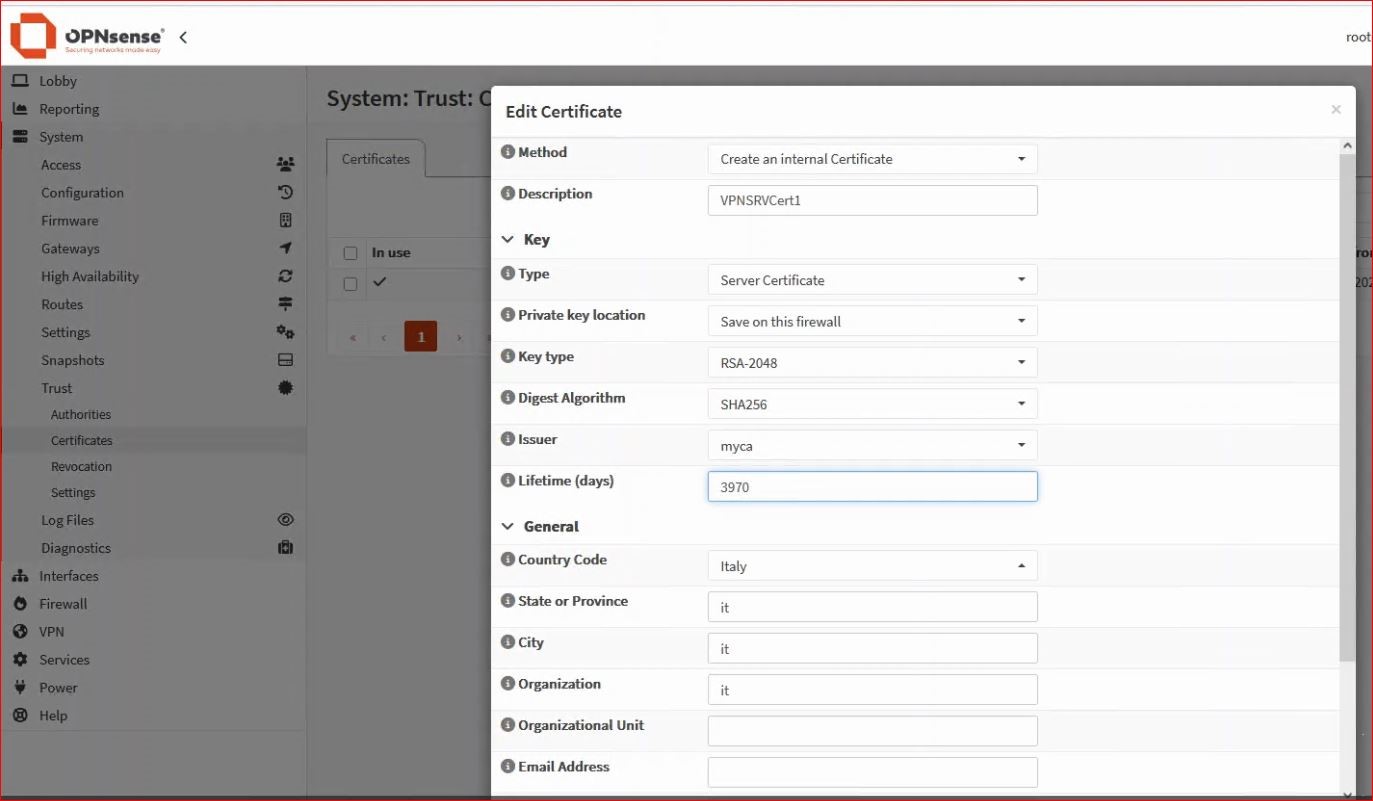
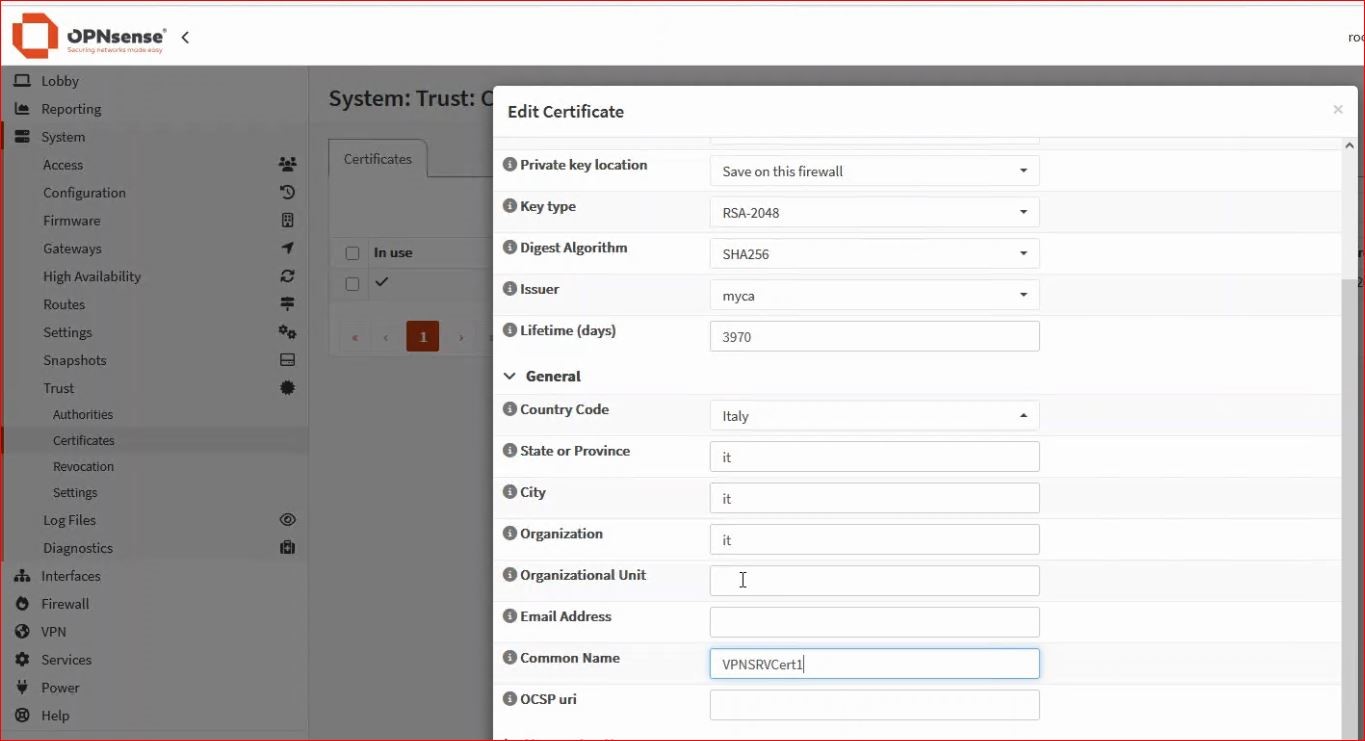
-Server Certificate
From the menu, select System → Trust → Certificates and add an internal certificate – Server certificate.
Fill in your internal server certificate, making sure to choose the correct CA (in this example, the one just created), an appropriate lifetime, and a meaningful common name.
2. User creation
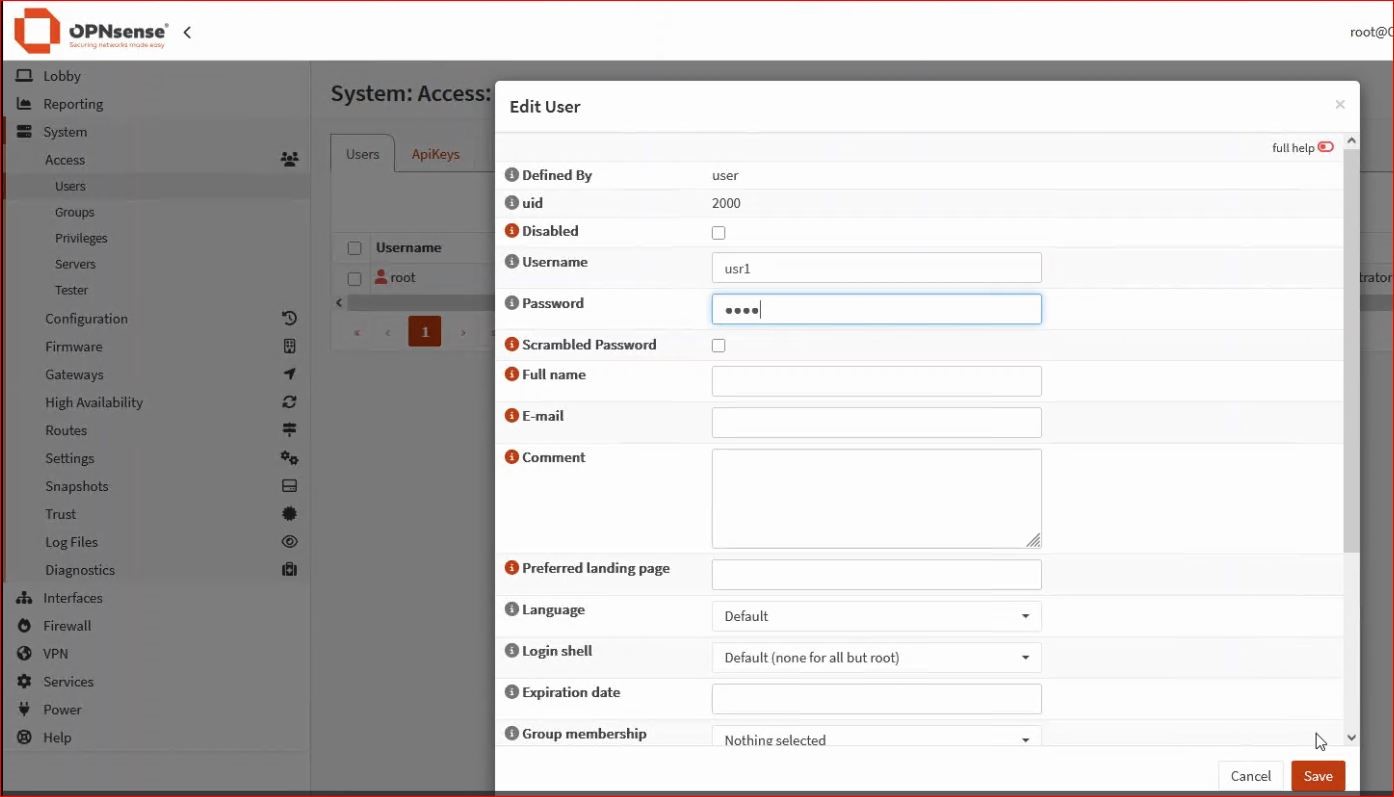
Per ogni utilizzatore della VPN devo creare un utente e il relativo certificato.
ATTENZIONE: il nome utente e il nome del certificato dovranno essere identici!
Dal menu scegliete System→Users e quindi aggiungere un utente (in questo esempio usr1)
3. User certificate creation
From the menu, select System → Trust → Certificates and add an internal certificate – Client Certificate
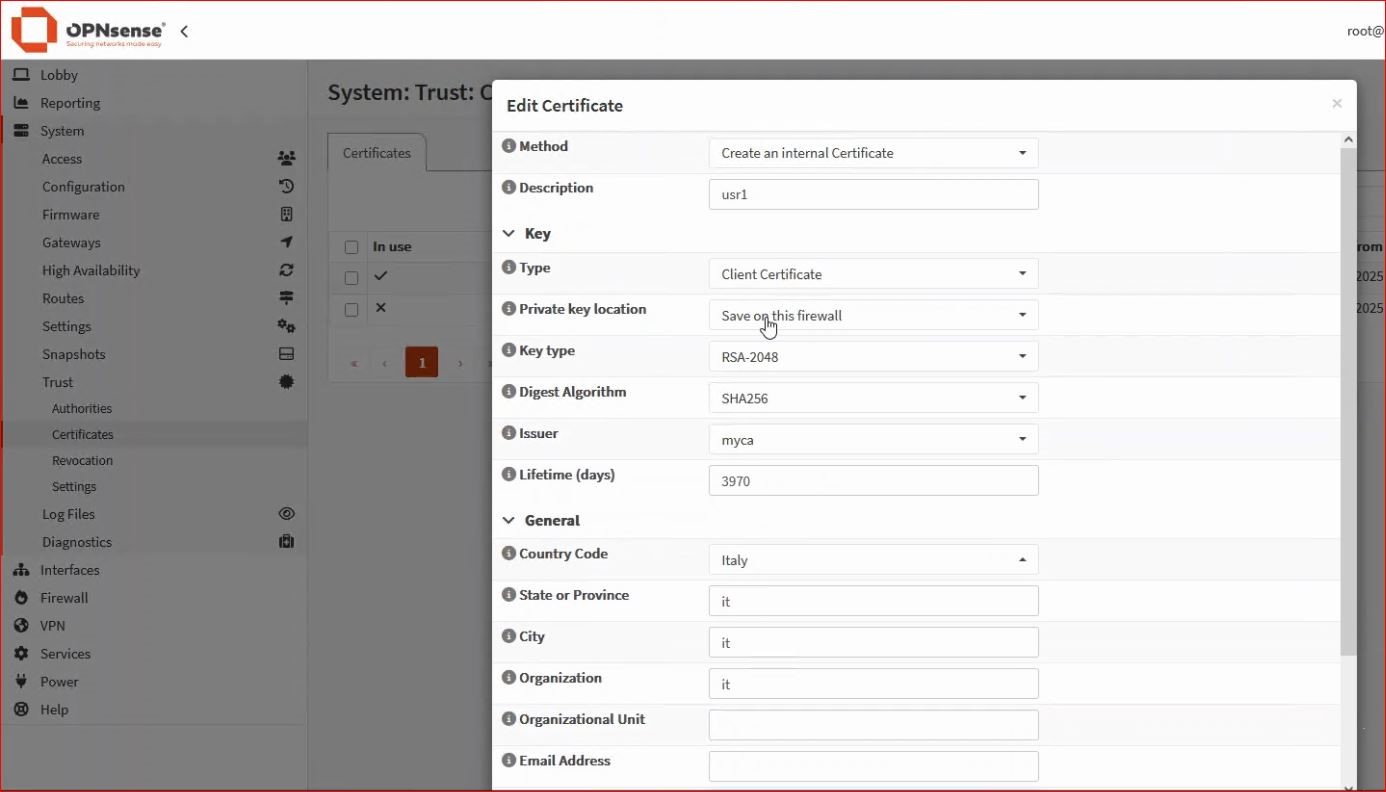
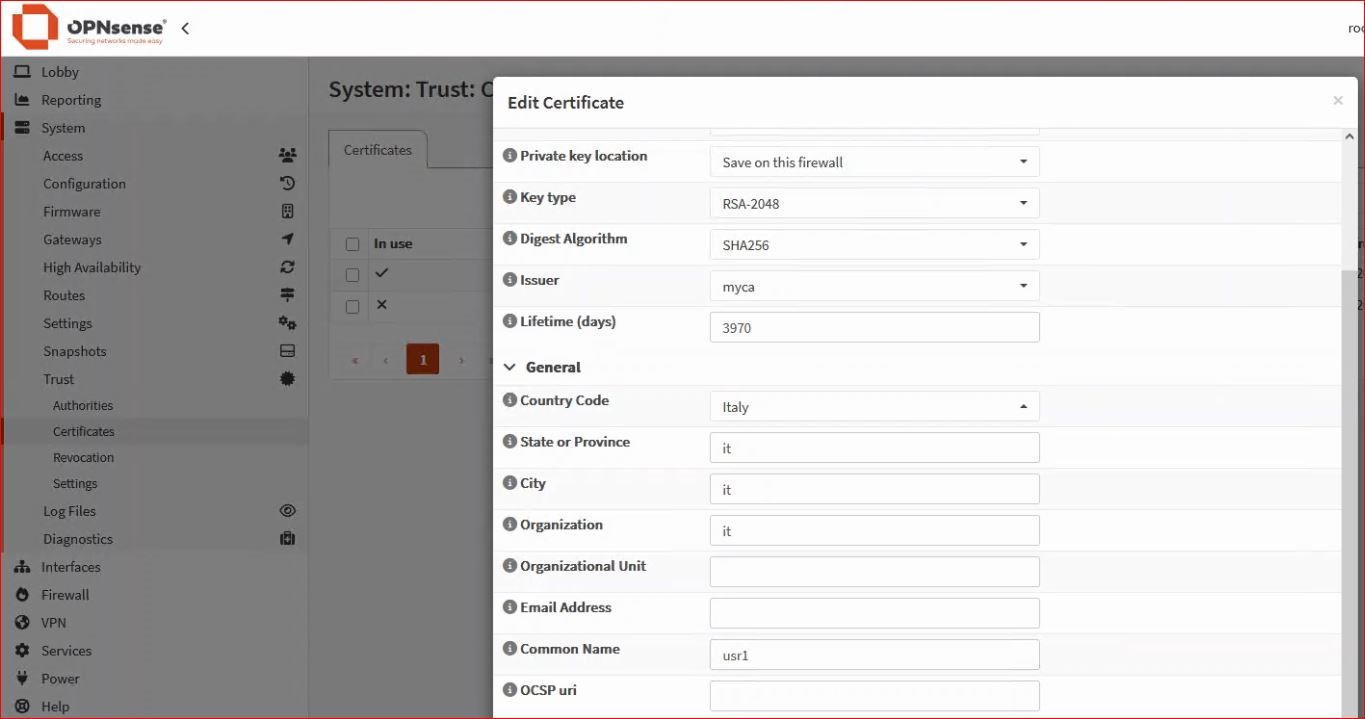
-Description- and especially -Common Name- must be identical to the username created earlier.
Note: At this point, in the menu System → Trust → Certificates, you will see the client certificate “usr1” with a little person icon indicating it is associated with a user, while the server certificate has an X showing it is not yet in use.
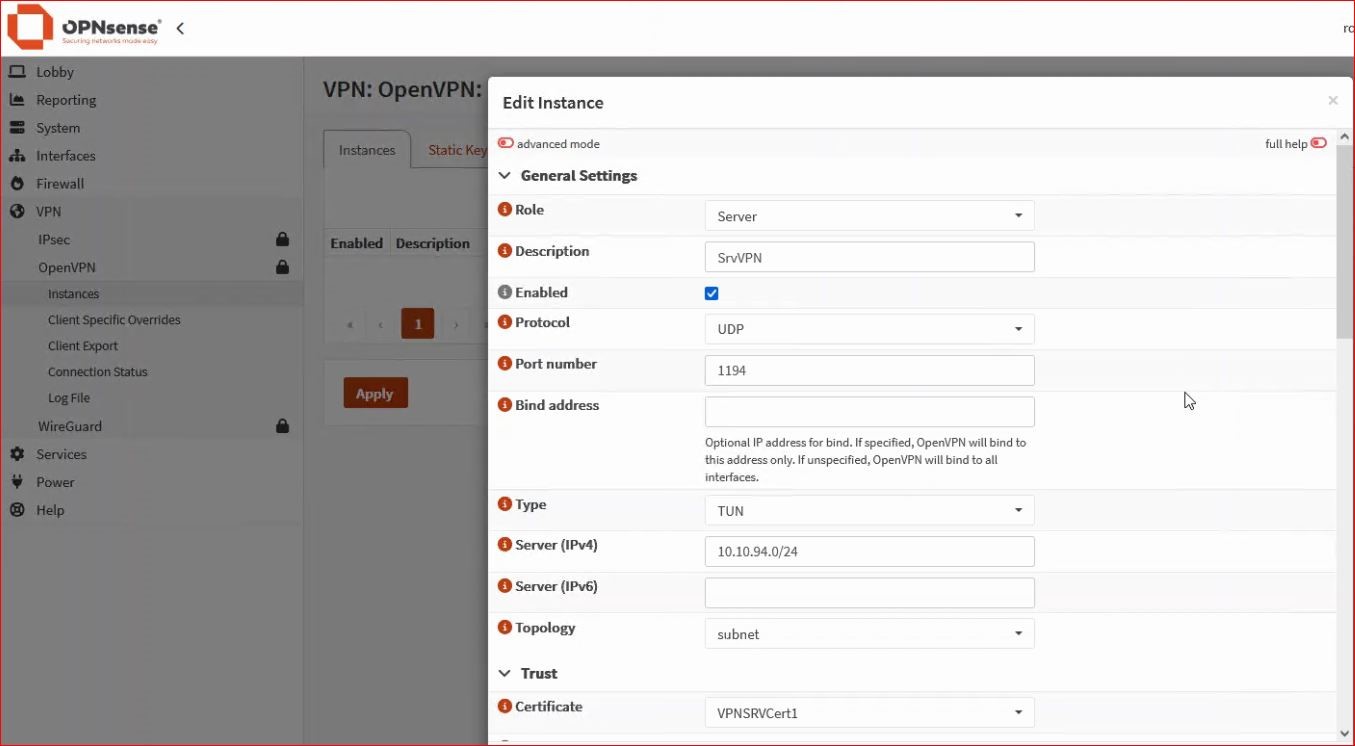
4. Instance Creation
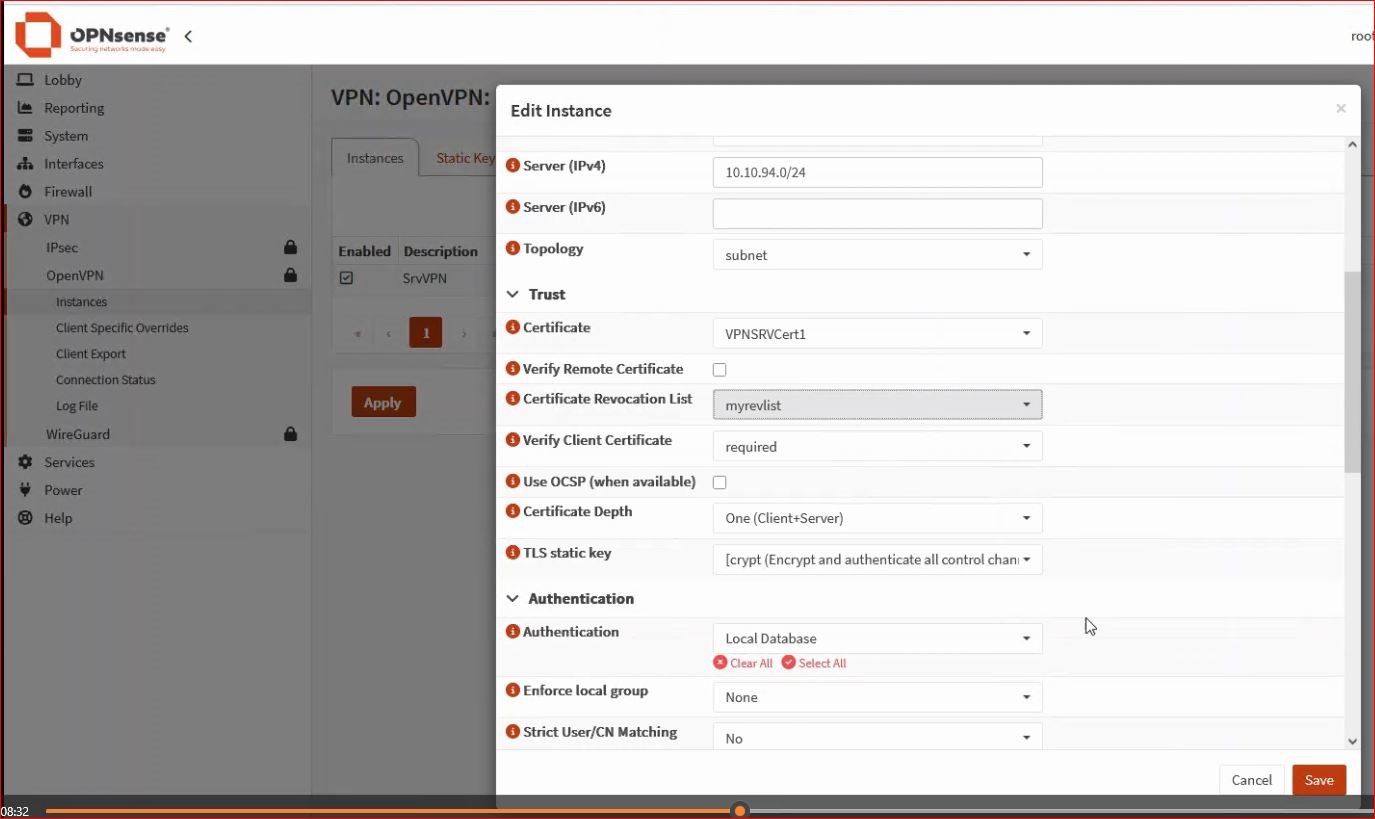
From the menu VPN → OpenVPN → Instances, add the OpenVPN server instance.
It is important to choose the correct certificate.
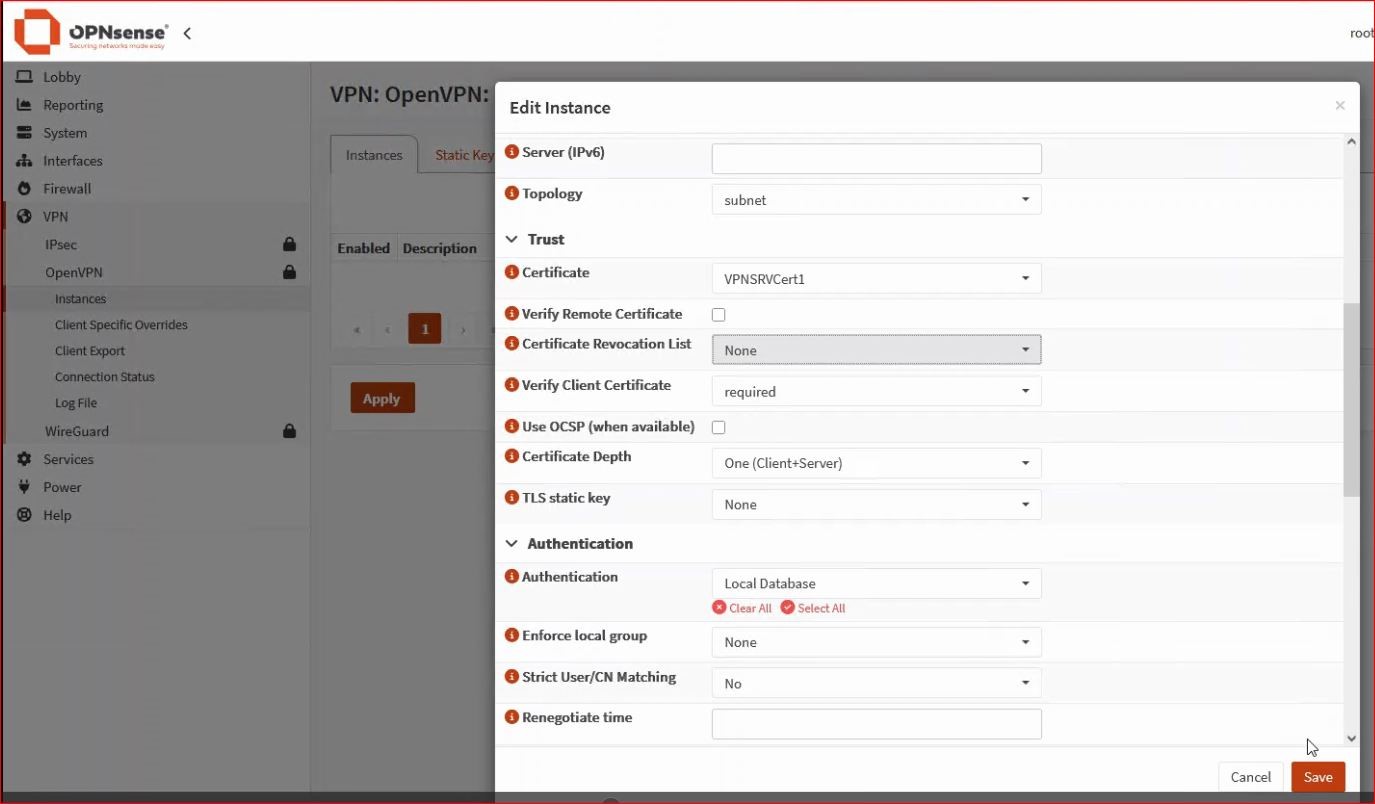
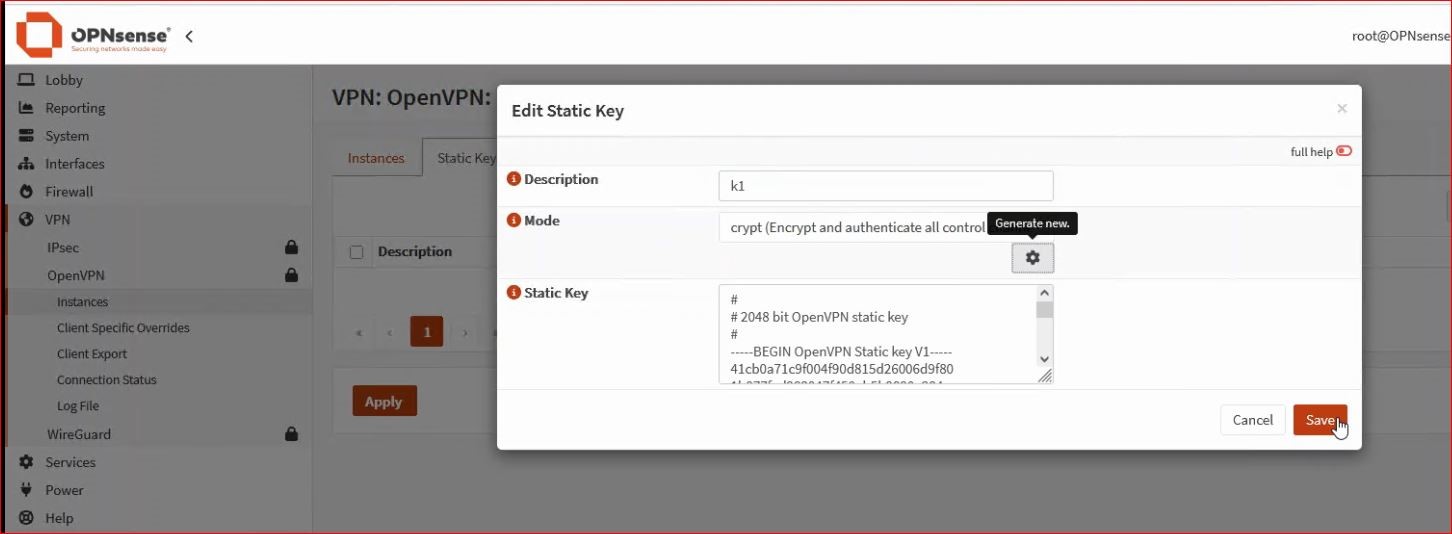
– Generate a key from the Static Key tab.
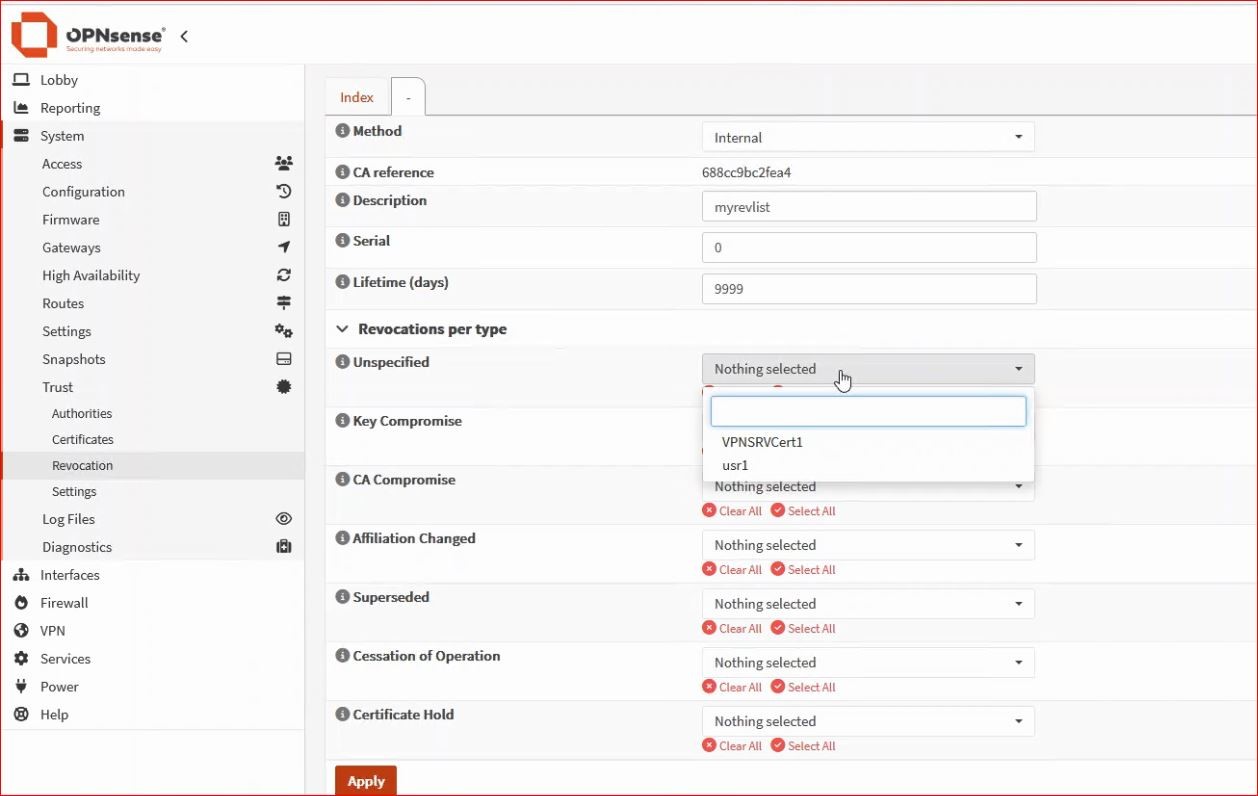
* You can also create a revocation list from System → Trust → Revocation and edit the CA used in the OpenVPN server (if you don’t want to revoke any certificates, you can leave Nothing selected).
* Once these two parameters are generated, I can add them to my OpenVPN server under Certificate Revocation List and TLS Static Key, respectively.
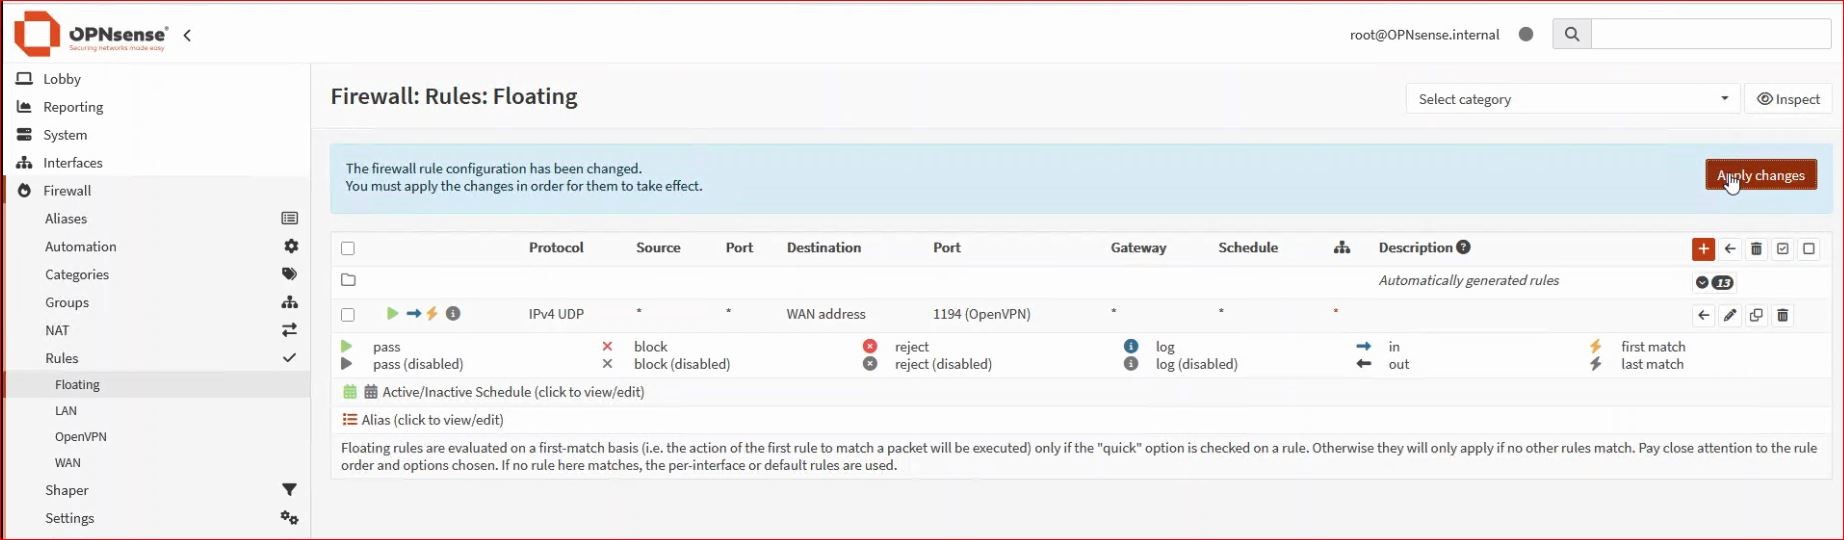
5. Rule creation
One way to allow connections to the OpenVPN server is to create a rule in Firewall → Rules → Floating. In our example, I need to allow access on the WAN to UDP port 1194.
Then, I will need to add a rule on the OpenVPN tab to allow VPN traffic. Initially, I recommend allowing everything and then narrowing the rules according to the requirements.
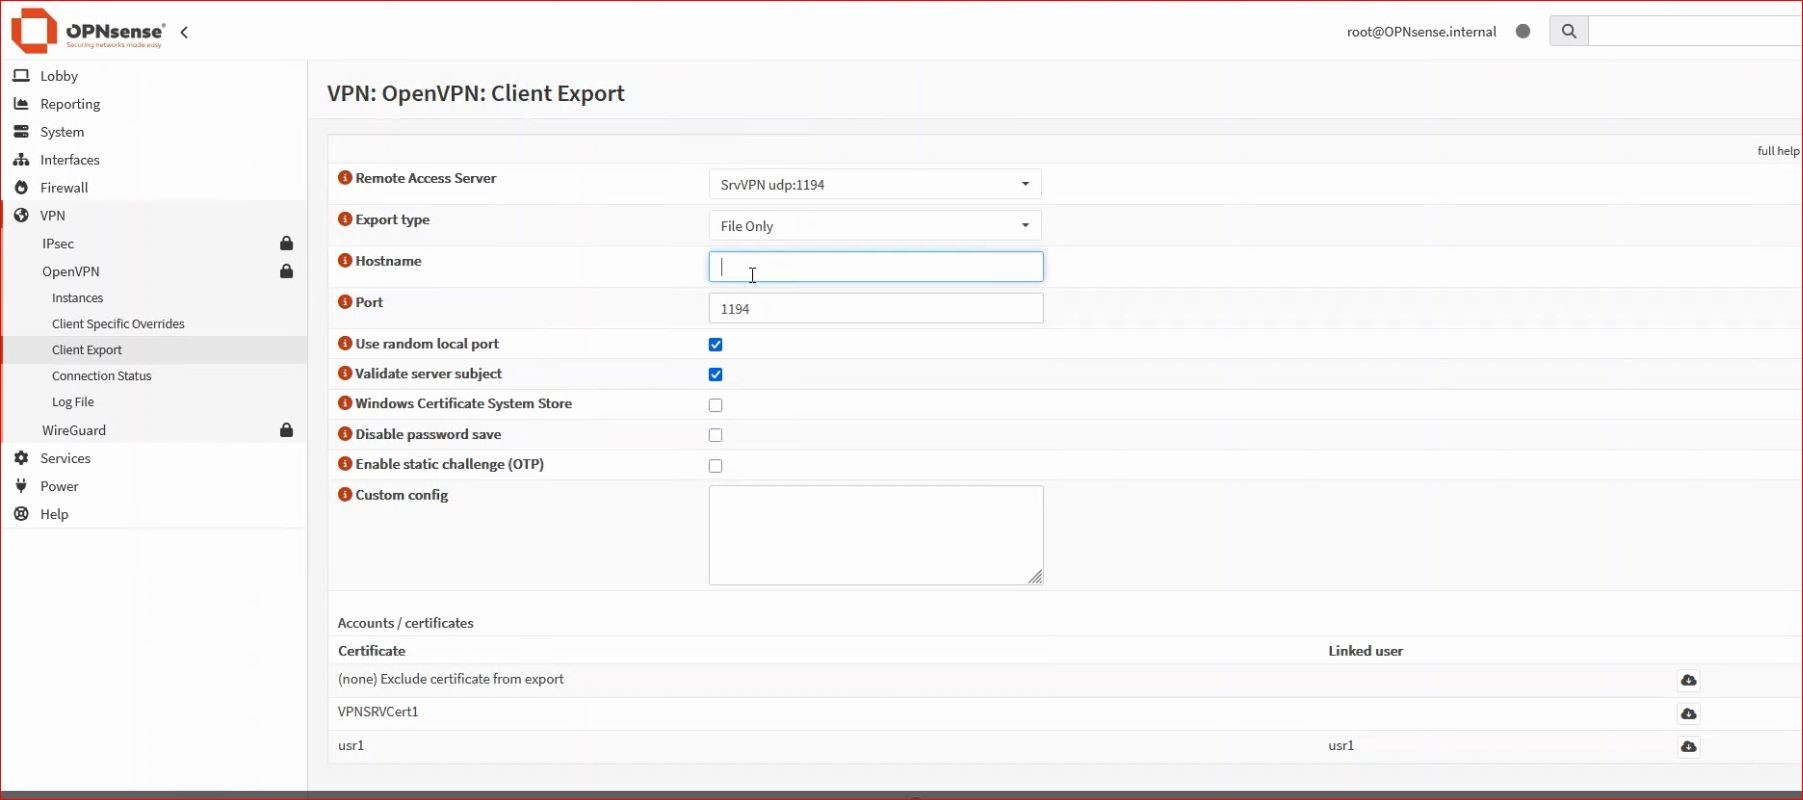
6. Exporting the certificate for the OpenVPN client
OPNsense includes the Client Export utility. In the Hostname field, you must enter the IP or the FQDN that points to the public IP through which you can reach the firewall on the WAN.
7. Type TUN Vs DCO
You can experiment with a new OpenVPN parameter, especially useful for speeding up VPN traffic.
Edit your OpenVPN server (from VPN → OpenVPN → Instances), change the type from TUN to DCO (experimental).
Save.
You don’t need to do anything else on the firewall. To test it on the client, disconnect from the VPN (if connected) and reconnect. In various tests, I noticed a speed increase of 10% to 20%, with brief initial peaks of 30% (depending on several factors). If the fact that DCO is experimental makes you uneasy, or you notice any issues, you can easily switch back to TUN.