This guide explains how to connect a PC to corporate resources through Remote Desktop Protocol, RDP and file sharing. We assume that the OpenVPN is already functional, configured and active.
Make an RDP connection from client
IMPORTANT: To connect to our PC, you will need to be connected via VPN to our company.
There are several programs for making a connection in RDP.
 Remote Desktop Connection: program pre-installed on Windows
 Microsoft Remote Desktop: downloadable from the Microsoft Store, it allows you to save multiple workstations to access
 Microsoft Remote Desktop: Free app downloadable from the Apple Store for MacOS, iOS and iPadOS and from the Play Store for Android
Now we’re going to see how to connect through. The preinstalled Windows program will be used, but to do this, all the programs mentioned above will behave in the same way.
First, you will be asked to enter the IP address of the location to which we want to connect.
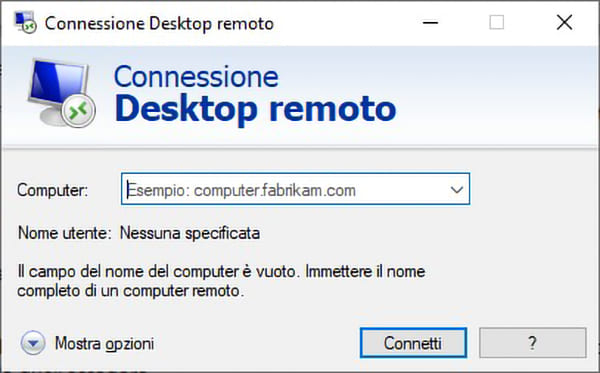
Once the address has been entered, the login credentials (user and password) that will be used to log in to the PC will be requested.
In the case of a domain, the username must follow the correct syntax, choosing between the following two:
- domainnameusername
- username@domainname
Once you have entered your credentials, a message will be displayed asking you to accept the certificate in use.
Select OK to continue and access your desktop remotely.
If we want to set the username without being prompted for each login, select Show options from the main window.
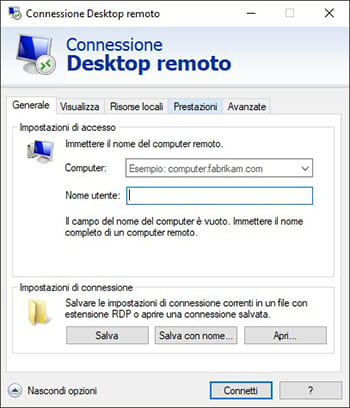
And set the name in the Username field, following the syntax indications previously indicated.
Connecting corporate network resources:
Note: we do not recommend this practice except in some particular cases due to the high bandwidth it requires and occupies.
Connect:
To connect network resources, such as data areas on file servers or resources shared with other users, it is good to connect network drives on your local computer. Before you start, you must be connected to the corporate VPN.
On Windows, open a File Explorer panel and select This PC in the left menu.
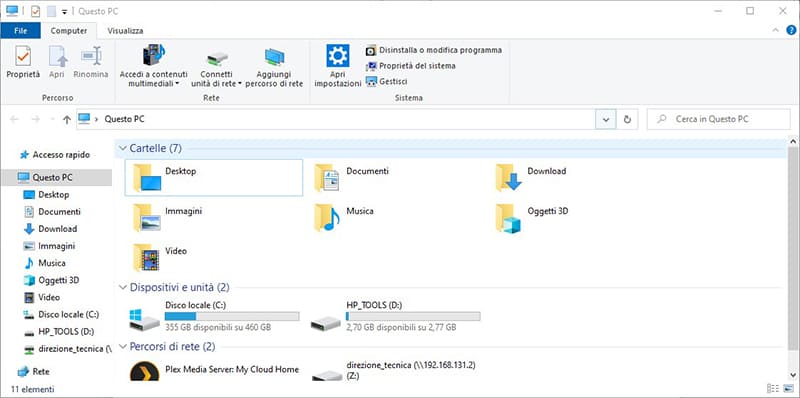
Select Connect network drive in the top menu bar to start the configuration wizard
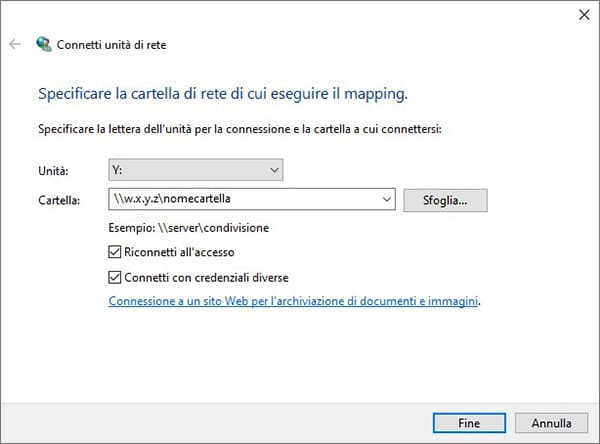
Set up the fields:
Unit: choose the drive letter, the first free letter is automatically presented (reverse alphabetical order)
Folder: here the connection to the server must be indicated. The syntax must be that indicated in the Example. You can use the IP address or FQDN of the server to which we want to connect, followed by the name of the share.
Check the Reconnect on login option, in order to save the resource permanently, if you want to log in temporarily, remove the tick.
Check the Connect with different credentials option to log in with your office credentials, and not with those of the PC from which you are connecting.
Once the configuration is finished choose the Finish button.
In case you have NOT chosen to log in with different credentials, the contents of the folder will be automatically shown.
If you have chosen to log in with different credentials, your login credentials will be requested. The username must follow the correct syntax, choosing between the following two:
- domainnameusername
- username@domainname
Once entered, give OK and the contents of the folder will automatically be shown.
If you have chosen the Reconnect on access option, your network resources will be shown in the File Explorer menus every time you start your PC.
Alternative method
Alternatively, you can add a network resource from the server’s shared resource view.
Press the start button and enter the server address preceded by and send.
This will show all active shares.
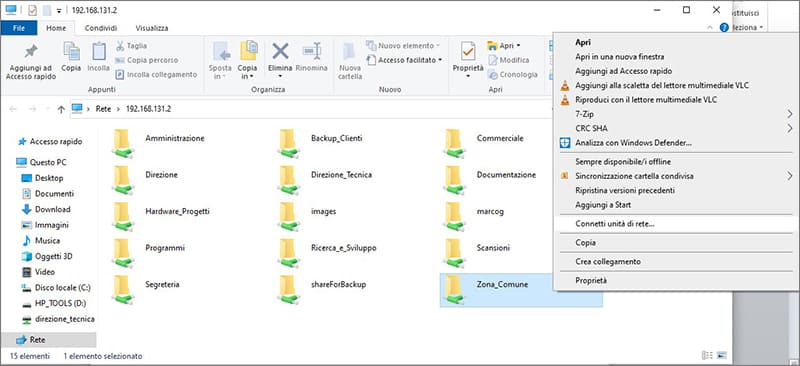
Press the right button of the resource to which you want to connect and select Connect network drive.
The configuration menu seen previously will be opened, to be set with the same indications listed.
